Understanding Image File Types

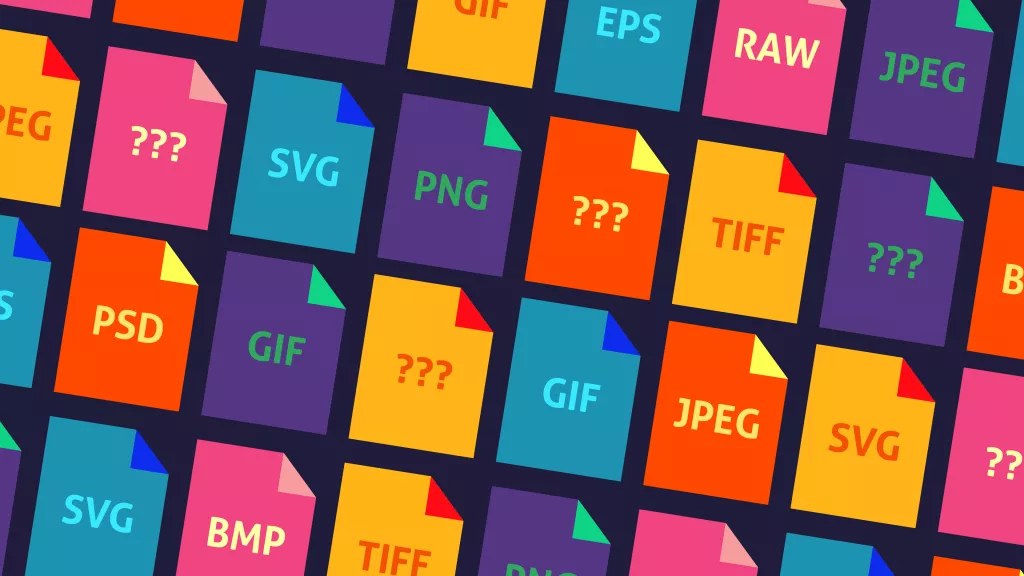
Did you know that certain image file types should only be used in specific contexts? Did you know that most website owners seem to not understand which image file types should be used for the web and thereby end up slowing down their site load time which lowers their SEO rankings. This article should help provide a better understanding of images for the web.

There are two main categories for image types

Raster Image Files

The raster image file format is probably the most common on the internet. JPEG, GIF, and PNG are all raster image files. Another way to understand the raster image files is that every pixel in the image has a defined color, position, and proportion based on resolution. And since a raster image is static, it cannot efficiently be resized. This is why you see a lot of "stretching", "distorting", "squishing", and even "pixelated". Most photographs and images on the internet are rasterized image files.

Vector Image Files

Some of the more common vector image file formats are SVG, EPS, and even PDF. As opposed to the raster image files, the design and shape of a vector image is tied directly to a pixel and therefore the images are more flexible. This means that no matter what size (large or small) image is used, the image can proportionally adjust properly.

The Most Popular Image File Types

  1. JPEG (and JPG) - Joint Photographic Experts Group
    JPEG is a raster image file format with lossy compression that makes it great for "shareable" images. The "lossy" aspect means the file size is reduced but also the quality of the image goes down.
    Advantages/Disadvantages
    - Universal Support
    - Low File Size
    - Lossy image compression can lead to poor text
    WHEN TO USE - -
    - Good for blogs and articles, product images, and more.
    WHEN NOT TO USE - -
    - Do not use for infographics and images with lots of small text or tutorial screenshots
  1. PNG - Portable Network GraphicsPNG is a raster graphic and is similar with lossy compression but it offers better text reada
    bility over JPEGAdvantages/Disadvantages
    - Higher quality images and clearly visible text
    - BUT larger file sizes can slow down a website.
    WHEN TO USE - -
    - Good for infographics, banners, screenshots, coupons, and images that use text
    WHEN NOT TO USE - -
    - Don't use for high-resolution photos because it will cause larger than normal file sizes.
  1. GIF - Graphics Interchange Format
    The GIF is another raster graphic format that also uses lossless compression, but it constrains the image to 8 bits per pixel with a limited palette of 256 colors. Most people know the GIF format as a method of animating images and therefore internet-friendly.
    Advantages/Disadvantages
    - Low file sizes
    - Animation support
    - 8-bit limitations means lower image quality
    WHEN TO USE - -
    - Spice up content with GIFs to demonstrate how to complete tasks in tutorials and guides.
    WHEN NOT TO USE - -
    - If you need more than 8-bit color, do not use GIFs
  1. WebP
    An image format developed with better lossless and lossy compression. On a website, switching from JPEGs and PNGs to WebP can not only save disk space but also bandwidth.
    Advantages/Disadvantages
    - Smaller files with better image quality
    - Not supported universally
    WHEN TO USE - -
    - Replace all JPEGs and PNGs to save bandwidth and site speed.
  1. TIFF - Tagged Image File Format
    Most commonly used for storing and editing images that will be used for print. TIFF files tend to be extremely large and do not use compression.
    Advantages/Disadvantages
    - High-quality files for print publishing
    - Large files with no compression
    - Limited browser support
    WHEN TO USE - -
    - Used by scanners to preserve quality of scanned documents
    - Use when preparing images and graphics for publication
  1. BMP - Bitmap
    An outdated image file format that maps pixels with little or no compression. These can be impractical to store or handle.
    Advantages/Disadvantages
    - Griant file sizes with no noticeable gains over WebP, GIF, or PNG.
    WHEN TO USE - -
    - None
  1. HEIF - High Efficiency Image File Format
    This image file format was developed by the team behind MPEG video format and is a competitor to JPEG. Compression is twice as effective as JPEG which make the quality of the image much higher with the same file size. The file format is also based on pixel mapping which means its easy to scale up the image without losing quality.
    Advantages/Disadvantages
    - Quality to file size ratio
    - Currently no browser support and limited OS support
    WHEN TO USE - -
    - Mainly used on phones
  1. SVG - Scalable Vector Graphics
    A markup language to render two-dimensional images right inside the browser. It uses XML text to outline shapes and doesn't rely on raster format. This means SVG images can scale without loss of quality.
    Advantages/Disadvantages
    - Small file size
    - Loss-free scaling
    - Not ideal for complex drawings
    WHEN TO USE - -
    - Ideal for logos, icons, illustrations that are needed to scale in a responsivel design.
  1. EPS - Encapsulated Postscript
    A vector image file used for storing illustrations. EPS is actually a text-based document that outlines shapes and lines with code rather than mapping pixels and colors.
    Advantages/Disadvantages=
    - Lossless scaling
    - Printer support for documents and designs
    WHEN TO USE - -
    Mostly used for storing, saving, and printing illustrations with Adobe products.
  1. PDF - Portable Document Format
    PDFs are files that are based on the same PostScript language that powers the EPS vector image files.
    Advantages/Disadvantages
    - Indexable and searchable text
    - Can include links and interactive elements
    - Lossless scalability
    - Cannot be included in web content, must be embedded
    WHEN TO USE - -
    - Creation of interactive visual reports or infographics
  1. AI - Adobe Illustrator Artwork
    Image format designed by Adobe to save image and project state. Not meant for web and isn't supported in browsers.
    Advantages/Disadvantages
    - All strokes, lines, shapes, filters, are customizable and reversible
    - Scale up or down freely
    - Large file sizes
    WHEN TO USE - -
    - Saving and storing Adobe Illustrator projects
  1. XCF - eXperimental Computing Facility
    Is an open-source file type from the application GIMP. Equivalent to PSD files. Not supported by web browsers.
    Advantages/Disadvantages
    - All paths, files, and shapes are customizable and reversible
    - Lossless image quality
    - Large file sizes
    WHEN TO USE - -
    - Saving and storing GIMP projects
  1. INDD - Adobe InDesign Document
    Native file format for Adobe InDesign. While most would refer this as an image file format, it also has links to visual elements beyond text.
    Advantages/Disadvantages
    - Store large multi-page design projects
    WHEN TO USE - -
    - Used by graphic designers for designing posters, flyers, magazines, and pamphlets.
  1. Raw Image File Types
    These are file types that come from digital cameras to store full-quality images for later post-production and editing. Most RAW files offer up to 16,384 shades per color channel in a single picture (as opposed to the 256 shades per color channel in JPEG).
    Advantages/Disadvantages
    - Higher quality pictures with more variablity in color
    - Giant image file sizes (sometimes more than 40megabytes)
    WHEN TO USE - -
    - When saving your images from your digital camera for future post-processing and editing.

Process of Enqueuing Resources in WordPress

The basic concept of including and/or adding resources (scripts and stylesheets) to any website is to add it to the <head></head> section of the HTML document. But what happens when you have a dynamic content management system like WordPress where multiple different systems (WordPress core, plugins, and themes) may all be attempting to add the same scripts and/or styles? Unless there is a management to control how assets are added to the site, the site will have nothing but trouble.

WordPress solved this issue early in its history by standardizing the method in which all assets are handled and processed on the site. Almost everything added to a WordPress site runs through the hook wp_enqueue_scripts. This article will talk about how the hook works in order to add stylesheets and scripts to the site, how dependency management works, and some advanced tips and tricks.

So how does this wp_enqueue_scripts work?

Basically, there are two steps taken when adding a script of stylesheet. (Though there is a shortcode where it will appear only one step is taken... more on that later.)

  1. We need to register the script... i.e inform WordPress where the script is located.
  2. We need to enqueue the script and connect it to the WordsPress hook that understands whether to place the script into the site's header or right before the closing <body> tag.

PRO TIP: So why are there two steps? Because there may be times you want to "register" the script, but you may only want to conditionally load or use that script in one or two locations of the site. The two-step process provides modularity.

Basics of enqueuing

As mentioned earlier in the article, everything revolving around the enqueuing of assets to a WordPress site is going to run through the wp_enqueue_scripts hook. If you are interested in learning more about WordPress hooks, I recommend starting here. Inside the wp_enqueue_scripts hooked function, we use four different WordPress functions that handle the registering and enqueueing of the assets.

In the above code example, you can see that script is first registered using the wp_register_script function and then later in the function the same identifier ('custom-script') is called inside the wp_enqueue_script function. And the same is done for the style.css file using the wp_register_style and wp_enqueue_style functions.

Dependency

One of the major benefits of using the WordPress enqueueing system is that it already has built-in support for dependency management. (What is dependency management? Let's say you are adding a jQuery tooltip script and in order for the tooltip script to function it needs jQuery to load BEFORE the tooltip script. Dependency management takes care of all that to make sure everything that is required to load happens in the right order.) In fact, because the WordPress wp_enqueue_script function has dependency management, we have the option of simply enqueueing the script and not run a separate registration function. Here is an example:

In the above example, the dependent.js file is given a script ID (custom-dependency), declared the location (plugins_url( '/js/dependency.js'), and then tells WordPress that this dependent.js script file requires (depends upon) jQuery to be loaded.

Load a Script in the Header or Footer

Sometimes you MUST load a script and/or stylesheet in the header in order for the site to function properly. But sometimes you can have the script load right before the closing of the </body> tag. There are many benefits of loading a script at the end of a page, but one of the key ones is it improves the speed of a site and helps eliminate "render-blocking scripts" that you'll see in lots of website speed measurement reports.

This is where another benefit of the enqueueing functionality in WordPress comes into play. Using the fifth parameter in the wp_enqueue_script function (note: the fourth parameter is an optional version number of the script/stylesheet), we can specify whether or not to load the script in the header or the footer.

In the fifth parameter, by stating the argument to be true, the script will be loaded in the footer. If you state the fifth parament to be false, the script will be loaded in the header. (NOTE: if you leave off this fifth parameter, the script will automatically be loaded in the header.) This header/footer option as a fifth parameter is only utilized in a script enqueue process (wp_enqueue_script). If you are dealing with a stylesheet (wp_enqueue_style), there is a different parameter used in this location.

Only Load a Stylesheet on a Specific Media Type

If you are familiar with writing Media Queries in CSS, you will be right at home with utilizing the fifth parameter in the wp_enqueue_style function. The fifth parameter for those function allows you to control the stylesheet will be loaded based upon which media type is in use. (Example: screen, print, handheld, etc). For more about Media Types, you can read this article.

Quick Recap

To dig deeper into wp_enqueue_script function, you can head over to developer.wordpress.org.

wp_enqueue_script( $handle, $src, $deps, $ver, $in_footer );

  • $handle = The name of the script. Should be unique
  • $src = Full URL of the script, or path relative to the WordPress root directory
  • $deps = An array of registered script handles this script depends upon.
  • $ver = String specifying a script version number
  • $in_footer = Whether or not to enqueue the script in the header or footer (true/false)

To dig deeper into wp_enqueue_style function you can head over to developer.wordpress.org.

wp_enqueue_style( $handle, $src, $deps, $ver, $media );

  • $hanlde = The name of the stylesheet. Should be unique
  • $src = Full URL of the stylesheet or path relative to the WordPress root directory
  • $debs = An array of registered stylesheet handles this stylesheet depends upon.
  • $ver = String specifying stylesheet version
  • $media = The media for which this stylesheet has been defined.

TL;DR

wp_enqueue_scripts (plural) is the WordPress hook that we connect a PHP function containing our wp_enqueue_script() and wp_enqueue_style() functions in order to connect all our assets (scripts and stylesheets) in WordPress.

How to Comment CSS

Placing comments in a CSS file or code block can serve multiple purposes.

  • CSS comments can be used to explain the concepts of a block of CSS.
  • CSS comments can be essential during the development of a site to turn on/off specific elemental stylings.
  • CSS comments can control a temporary change into a site that may be reverted at a later date.
  • CSS comments can be crucial to organizing the logical structure of a CSS stylesheet.

For whatever the reason used to comment CSS, commenting CSS code is a simple way to not allow the commented code or text to execute when browsers load a stylesheet upon a visit to the site.

Different methods of commenting CSS

Both single and block comments in CSS b begin with a /* (forward slash + asterisk) and end with a */ (asterisk + forward slash). Several examples of commented CSS using both the single and block comments:

There are no restrictions as to the number of CSS comments that are allowed to be used within a CSS code block or file. Plus, there is no “standard” as to how much styling you can give to your CSS comments, as seen in the example below.

Many times in large web projects, the stylesheets can grow in size quickly and become a beast to manage and maintain. In these types of projects, it is not uncommon to find table-of-contents commented into the CSS that is meant to make it easier to find the necessary CSS rules in the future.

Where to Comment CSS

CSS comments can be used in any location where CSS is used for a website.

  • CSS comments can be used within Inline CSS
    Inline CSS is when styling is applied to a single element directly in the HTML tag.
  • CSS comments can be used within Internal CSS
    Internal CSS is a quick way to apply CSS rules directly to the HTML page that the internal CSS is added. The Internal CSS is added within the <header> section of the HTML site and wrapped with a <style>... Insert Inline CSS...</style> tag.
  • Finally, CSS comments can be used within external stylesheets as was talked about above.

Do you have a specific way of styling your CSS? How well is your CSS commented? Could another developer come alongside and quickly understand the processes you are using to style your sites? Never be afraid to “over-comment” your CSS (and your code in general).

Secure Your WordPress Development

If you develop WordPress plugins professionally or as a side hustle, it is important to recognize security issues. With WordPress powering large swaths of the internet, code security should be a vital part of your development.

In this light, I wanted to share several key areas of security that every WordPress developer should be mindful of during their development of code projects.

Don't Let Direct Access Occur

While many web hosts are built around allowing access to files that reside on the server, we shouldn't allow our plugin files to be accessed directly.  We need to make sure that its only "WordPress itself" that is accessing the plugin files.

The best way to handle this is to perform a conditional check at the top of the plugin files that makes sure the file isn't being accessed from outside WordPress.

Require a specific password length

Many of the leading WordPress security plugins have the ability to force/require strong passwords for users. But one of the requests I've received from people is if there is a way to require passwords to be of a certain length. It seems that some users who work with clients are finding that some clients will reset a password to something "easier to remember" but not entirely secure, or the developer is trying to enforce a specific "password policy" and one of the aspects of a policy specifies a certain number of characters.

How to Set a Password Length Requirement

Setting a password length requirement is fairly easy since WordPress already provides a hook that occurs before a password is actually reset.  The hook is validate_password_reset, and it allows developers to verify aspects of the user entered password before passing it through the password reset function.

Using Dashicons in WordPress Theme

Many WordPress users learn about using Dashicons when they go to create their first Custom Post Type and assign a Dashicon to represent that Custom Post Type in the Admin menu.  But then the frustration begins as soon as you attempt to use a Dashicon on the frontend of the site.

The developer resources at WordPress.org make it extremely easy to copy/paste either the Glyph, HTML, or CSS version of a Dashicon.  But if you have ever tried to copy/paste a Dashicon into a widget area or a post you would have experienced the frustration of nothing showing up.

Why?

The Power of the Body Class in WordPress

For many WordPress users who are stepping beyond the basics of WordPress and starting to customize different parts of a site based on the site's template hierarchy, it can get pretty daunting to figure out WHICH page template is being used to render WHICH part.  The heart of this answer is in understanding more about WordPress template hierarchy. There is even a very useful visual map to help find your way to the right template.

Eliminating the JUMP from WordPress Read More Link

WordPress has a method of splitting your content to only show the "top half" on the is_home() conditional location.  (This is normally the "Blog" feed page in WordPress.  It could be your homepage, or it could be a custom page depending on your theme and setup.)  This "splitting method" is called the "Read More" link.

The "Read More" link is identified as <!--more-->  in the code/content area of your WordPress post/page.  The location in your post content that contains this "Read More" link will return an active link from the blog feed to the full post page.  What happens next when a reader clicks on the "Read More" link presents the "issue" that WordPress owners experience.

Taking Control of the WordPress Auto Paragraph Tag

WordPress has a function called wpautop() that very kindly "autowraps" and adds paragraph tags (<p></p>) around elements of your content.  While this is extremely helpful for users, those that may be more unfamiliar with HTML and those that only want to use WordPress as a content publishing platform.  Those users that desire more control over the structure of the site may want to manage what elements exist or don't exist in the content structure.

For a long time, WordPress users have had access to filtering out the wpautop() function by adding a simple line of code to their functions.php file of their active theme folder.

remove_filter( 'the_content', 'wpautop' );

But the above code can also leave users with an unintended issue.  This code snippet will remove ALL the auto-inserted paragraph tags.  To truly have control over when and where this wpautop() function interacts with content, we need to be able to manage this on an individual post/page level.